Table Contents
- Introduction
- Create a project
- Setup the Flutter Chrome Extension
- Testing the Flutter Chrome Extension

Introduction to Flutter Chrome Extension
In this blog, we’ve seen how to create a Flutter Chrome extension that can be used in multiple ways. So we are going to go through all the apps step by step.
Use a Package
- js – This will allow any javascript function and also access any javascript objects by using dart code inside use the Flutter app
Create a Project
First, you need to create a project using the terminal ‘flutter create project_name’
After successfully created. You need to open the project using this command line ‘code .’ in the terminal and you can see your project files.
Setup the Project
First, we can look at the web folder and you will have manifest.json and index.html file and you will need to customize it.
Index.html File
First, we look at index.html. Here we need to remove most of the code essentially we will need to remove most of the code that is inside the body of this HTML file. so we will need to remove the service worker inside the script.
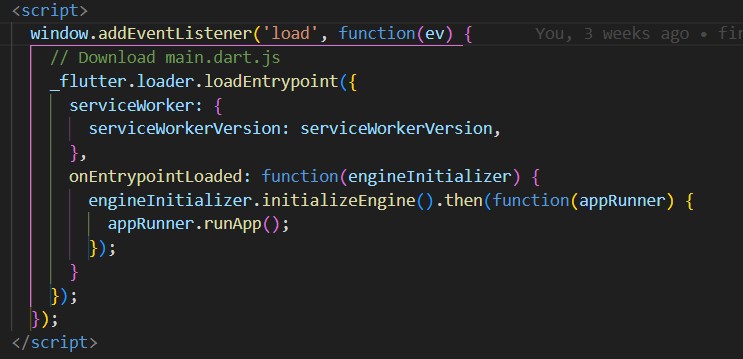
The only other difference from the standard file is that you can define the height and width. So you can do this in row number two by passing the style for the old HTML canvas that we have here so you can decide which height and width you can assign to to your Chrome extension.
<!DOCTYPE html>
<html style="height: 400px; width: 600px">
But I think the maximum width will be 800 so if you go larger than that it will be resized.
<!DOCTYPE html>
<html style="height: 400px; width: 600px">

<head>
  <base href="$FLUTTER_BASE_HREF">

  <meta charset="UTF-8">
  <meta content="IE=Edge" http-equiv="X-UA-Compatible">
  <meta name="description" content="A new Flutter project.">

  <!-- iOS meta tags & icons -->
  <meta name="apple-mobile-web-app-capable" content="yes">
  <meta name="apple-mobile-web-app-status-bar-style" content="black">
  <meta name="apple-mobile-web-app-title" content="flutter_chrome_app">
  <link rel="apple-touch-icon" href="icons/Icon-192.png">

  <!-- Favicon -->
  <link rel="icon" type="image/png" href="favicon.png" />
  <title>flutter_chrome_extension</title>
  <link rel="manifest" href="manifest.json">
</head>

<body>
  <script src="main.dart.js" type="application/javascript"></script>
</body>

</html>
That’s all we need inside the index.html and this will create the canvas to which we’re gonna add our widgets.
manifest.json File
The default manifest.json look like the following. So you have the name, short name, start Url, and a few more information including background color, theme color, and so on.
In this project, we just include the name you can give any name to assign to the Chrome extension that you need to pass the description and version then you will need to add the content security policy and keep in mind it’s the security features that will protect our chrome extension from cross-site scripting and other code injection attacks.
  "content_security_policy": {
        "extension_pages": "script-src 'self' ; object-src 'self'"
    },
The current setting that we have set up is inside the manifest.json file. Chrome extension can load object and use scripts that are coming from the same domain and that’s pretty much for now.
Then will need to add permission and this allows our extension to interact with our current active tab. If you don’t add this, you won’t be able to fetch the URL or the current tab which is needed in order to then fetch the content of the current tab
 "permissions": [
        "activeTab"
    ],
Then inside the action, we can just specify that the default pop-up is going to be the index.html so essentially whenever you open the Chrome extension you will use index.html file and then set up the icon.
Again by default, the icon will look like the default icon that any flutter app has essentially you will have a flutter logo if you want you customize it so just need to go inside the icons folder and you will replace the file so in this case, I am using my own logo
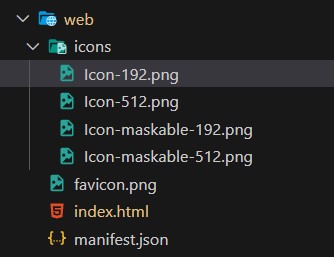
we can continue with manifest.json to select the manifest version number 3. The manifest version 3 is just a set of guidelines and requirements for developing Chrome extension. These are focused a lot on security & privacy and improve the performance of extensions inside the browse. Give here the full code in the manifest.json.
{
    "name": "flutter_chrome_app",
    "description": "A new Flutter project.",
    "version": "1.0.0",
    "content_security_policy": {
        "extension_pages": "script-src 'self' ; object-src 'self'"
    },
    "permissions": [
        "activeTab"
    ],
    "action": {
        "default_popup": "index.html",
        "default_icon": "icons/Icon-192.png"
    },
    "manifest_version": 3
}
That’s for all and Use the default increment count for demo purposes. Let’s get into testing the flutter chrome extension.
Testing the Flutter Chrome Extension
First, We can run the command in the terminal “flutter build web –web-renderer html –csp”. After running this command you can open the build directory. Directory – build/web
After you zip the web folder, you can open Chrome to search for “chrome://extensions/” and find Developer Mode in the top right corner and enable Developer Mode. After seeing 3 tabs like this

Click on the Load Unpacked tab and upload the zip after successfully it will appear as a Flutter extension on the Chrome extension like this.
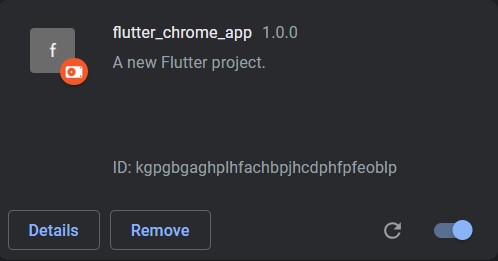
finally, you can play with your Flutter Chrome extension. if you need to know about blocking the screenshot in your app definitely the right place.
The source code is available on GitHub and if you have any doubts just comment below.
Subscribe to our email newsletter to get the latest posts delivered right to your email.

Comments