Table Contents
- Introduction
- Create Project
- Android Configuration
- IOS Configuration
- Testing

Introduction to Prevent Screenshot in Flutter
In this Blog, We have seen how to prevent screenshots and screen recordings in your Flutter app for Android and ios.
Sometimes, you must prevent your content from leaking or secure copyrighted data. So you need to block screenshots and screen recordings in your application. We can do this in Flutter without adding any package.
Get Started
First, you need to create a project using the terminal ‘create flutter projectname’
After successfully created. You need to open the project using this command line ‘code .’ in the terminal and you can see your project files.
Android Configuration
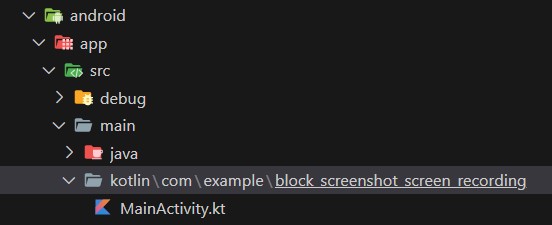
On Android, we need to navigate to the Android directory.
Directory – Android/App/Src/Main/Kotlin/com/PakageName/ProjectName and MainActivity.kt

MainActivity is like the main activity in main.dart. So we need to import the flutter engine and window manager package.
import io.fluter.embedding.engine.FlutterEngine
import android.view.WindowManager.LayoutParams
And then override the flutter engine configuration and add a secure flag
package com.example.test // replace your packageName

import android.view.WindowManager.LayoutParams
import io.flutter.embedding.android.FlutterActivity
import io.flutter.embedding.engine.FlutterEngine

class MainActivity: FlutterActivity() {
  override fun configureFlutterEngine(flutterEngine: FlutterEngine) {
    window.addFlags(LayoutParams.FLAG_SECURE)
    super.configureFlutterEngine(flutterEngine)
  }
}
IOS Configuration
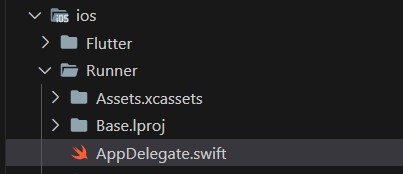
On IOS, we need to navigate to the IOS directory.
Directory – ios/Runner/Base.Iproj/AppDelegate.swift

In iOS we use the same trick. A trick is by adding an extension for the Ui window. Extend your textfield in the subview layer of the entire app, which makes the entire app secure and prevents screenshots and screen recordings.
We create an event for the UI textfield, making it safe to add it to the subview and add a y anchor and x anchor constraint to the textfield.
We’ve made sure the text field is in the center of the view, and don’t forget to recall your method.
import UIKit
import Flutter


@UIApplicationMain
@objc class AppDelegate: FlutterAppDelegate {
  override func application(
    _ application: UIApplication,
    didFinishLaunchingWithOptions launchOptions: [UIApplication.LaunchOptionsKey: Any]?
  ) -> Bool {
    self.window.makeSecure() // + add this line
    GeneratedPluginRegistrant.register(with: self)
    return super.application(application, didFinishLaunchingWithOptions: launchOptions)
  }
}

// +  add this section

extension UIWindow {
func makeSecure() {
    let field = UITextField()
    field.isSecureTextEntry = true
    self.addSubview(field)
    field.centerYAnchor.constraint(equalTo: self.centerYAnchor).isActive = true
    field.centerXAnchor.constraint(equalTo: self.centerXAnchor).isActive = true
    self.layer.superlayer?.addSublayer(field.layer)
    field.layer.sublayers?.first?.addSublayer(self.layer)
  }
}
It’s time for testing remember this method doesn’t work on ios and Android simulators. So you have to test it unreal device.
The source code is available on GitHub and if you have any doubts just comment below.
Subscribe to our email newsletter to get the latest posts delivered right to your email.


Comments